Knife repair, giving new life to a broken knife

Santa Monica Knife Sharpening
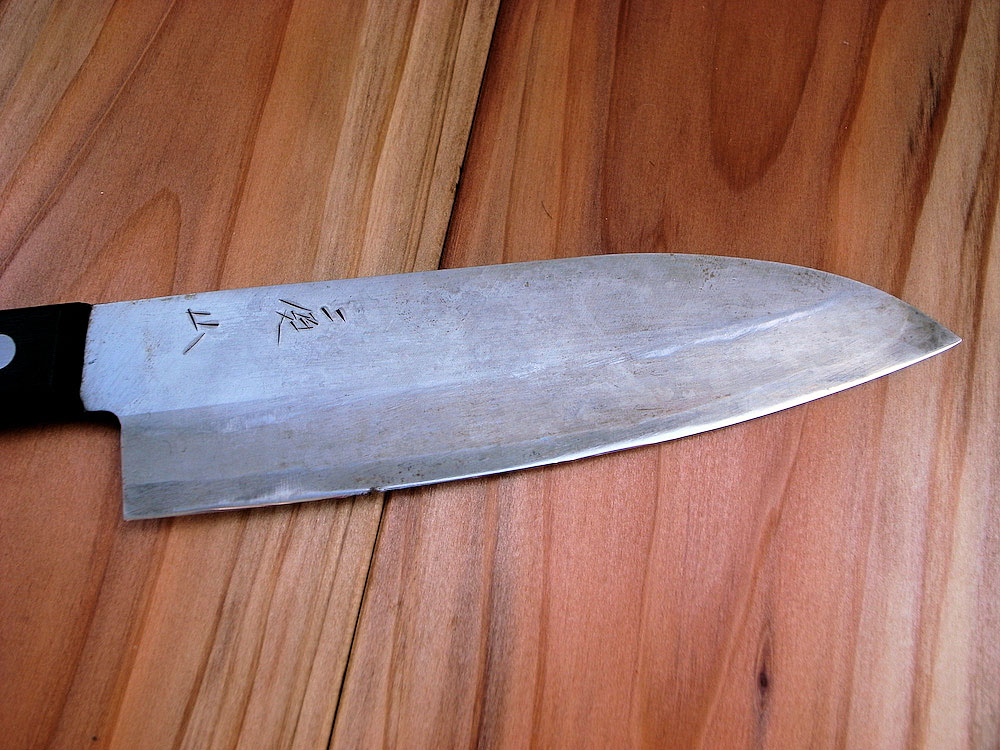
old broken knife with chipped edge

Unsharp broken knife before regrinding

This knife was given to me by a good friend, at first look it doesn’t look to bad except for the big chip right there the heel starts. After a closer look I realized that the primary bevel was concave and parts of the edge was folded over, I also realized that the secondary bevel was way wider in the back and at the tip. Look at that tip I could have folded it by hand, it was thin as aluminum foil. At the moment I just saw two different ways to fix it, one was to leave the primary bevel concave and try to give it a new edge on the side of a sharpening stone, or regrind a new flat primary bevel and give some sort of compound edge. I decide to give it a new primary bevel to get rid of all edge damages and big scratches on shinogi.

illustration of edge before and after regrinding

Illustration of edge before and after regrinding

Above is a little illustration what it look like before and after, and what I would like to achieve. First I went to work with a large blacksmith file, because of the amount of material that I needed to take off, just to realized that it didn’t give me much precision, tried a bunch of different coarse stones, the one that eventually seams to do the best job was Beston #500. With this stone I worked until I got an even flat primary bevel all the way to the edge, I also used it to set the secondary bevel. After that I changed to King #1000 to smooth both bevels out and did some initial sharpening. After that just a fast brush with Bester #2000, before starting with my favorite stone it’s a man made blue Aoto rated to #2000 but feels much finer. This blue Aoto gives that perfect mist to the soft steel on the primary bevel, its super soft and have great feedback; the only thing is that if you don’t want your hand to look dirty for days after, use glows. For final sharpening and finishing on the secondary bevel I use Kitayama #8000 also a great stone, after this just some light stropping, before setting the micro bevel with Shun #6000 wish gives a nice bite to the edge.

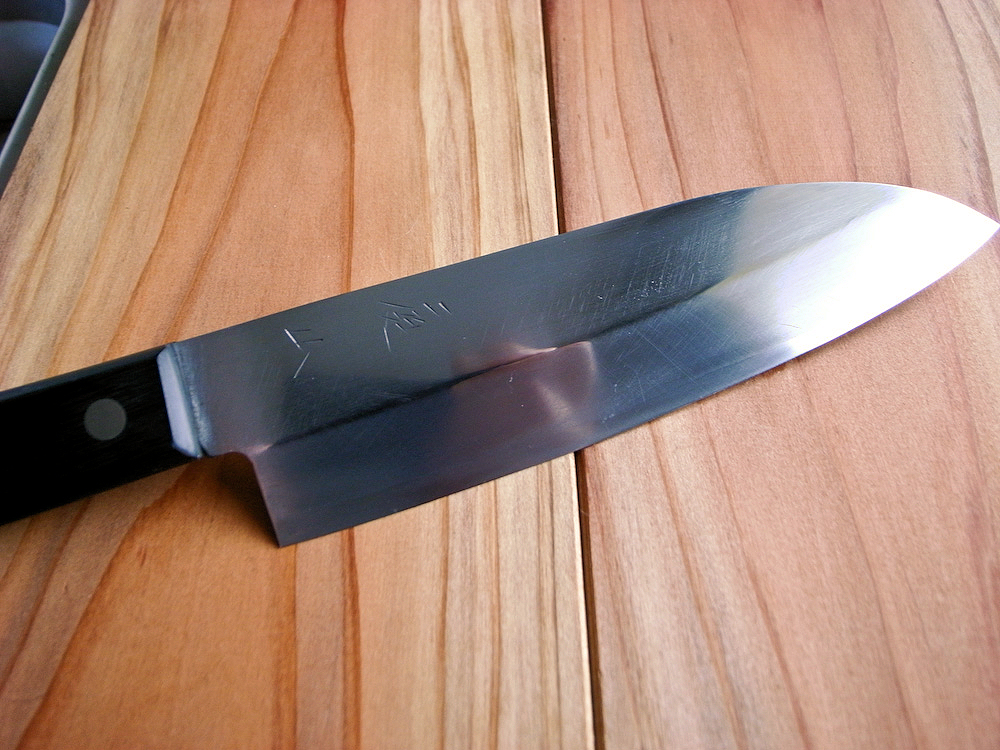
I also did some clean up and light polishing just to make it easier to clean, I’m using it daily now, and its one of my favorite knives. I realized that I’m not good at always cleaning and drying the knife after use, so it started to get some stains/rust on the pretty mist on the primary bevel, so I gave it a light polish with #2000 sandpaper and all is good now. Yes of course its sharp, not hair popping sharp, but sharp enough to shave with or to slice cigarette paper into small strips. Pictures of the knife after regrinding below.

Knife after repair, regrinding and polishing

Knife after repair, regrinding and polishing

Magnus Pettersson hand sharpener, now serving the whole Westside with free pickup and delivery: Santa Monica, Brentwood, Pacific Palisades, Venice, Marina Del Rey, Culver City and West LA.

For free pickup and delivery on the Westside, call/txt 310-486-6068 or email.


Increase your website traffic with Attracta.com

Shaving cheap with straight razor

Old dirty and rusty Worcester straight razor

Old dirty and rusty Worcester straight razor

Rusty and pitted tip of a Worcester straight razor

Rusty and pitted tip of a Worcester straight razor

This is an old Worcester Razor that I bought for $5, as you see it has been seeing better days. It’s dirty pitted, with some heavy dark rust spots to the front, but it is of good quality and will make a good shaver. The goal is to just getting it cleaned up a little, and in shaving shape fast and easy.

Sanding of Worcester Straight razor with 400 grit sandpaper

Sanding of Worcester Straight razor with 400 grit sandpaper

First a I got rid of the heavy rust with #220 and #400 grit sandpaper, after that I continued with #800, #1000, #1500 and #2000 just to make it a little smoother and easier to keep clean.

Worcester straight razor with a light clean up

Worcester straight razor with a light clean up

This is what it looks like after the light sanding job, time to start sharpening.
I started to carefully set a new bevel with Beston #500, I don’t think this step would have been necessary if I hadn’t got to that edge with the sanding paper. After that I did the primary sharpening alternating between Bester #2000, and a Shun #6000 stone as in the table below, with lighter and lighter touch for each step.

Step           Stone           Laps
1                #2000           20
2                #6000           20
3                #2000           12
4                #6000           20
5                #2000           6
6                #6000           16
7                #2000           2
8                #6000          10

I know it doesn’t seams logical to alternate, but until I started to do it like this learning to sharpen razors, I didn’t consistently get them hair popping sharp. I’m sure there are theories why it works, but I haven’t researched it. After this I start to finish the edge with Kitayama #8000, I used to use Naniwa super stones #12000 for this, but realized that Kitayama actually were doing a better job. After this step I usually finish up with 3M lapping film on granite, with edge trailing motion and some stropping with Blue magic polishing cream on leather and on a straight horse butt strop without any dressing.

Worcester straight razor passing the hanging hair sharpening test

Worcester straight razor passing the hanging hair sharpening test

Sharpness number 5, its popping hanging hair without problem.

The Worcester razor's edge magnified after sharpening and stropping

The Worcester razor's edge magnified after sharpening and stropping

This is what the edge look like magnified, pretty good for something that might be a 100 years old. It is a good shaver, not the smoothest ever but better than acceptable. I have no idea about how good it will hold an edge, because I have just used it once, but I have a feeling it will hold up for a few shaves with just stropping. If it’s cared for, I’m sure it might give 50 more years of shaving. I think a cheap straight razor like this is a great choice for someone just starting out using straights. You would never again have to go out and pay an arm and a leg for Gillette fusion, and you would be good to the environment recycling a piece of history not to mention how manly it makes you feel using a straight razor. I’m Swedish, so my preferences when it comes to vintage straight razors, is Swedish straight razors, and I try to pick up cheap ones as soon as I have an opportunity.

Magnus Pettersson hand sharpener, now serving the whole Westside with free pickup and delivery: Santa Monica, Brentwood, Pacific Palisades, Venice, Marina Del Rey, Culver City and West LA.

For free pickup and delivery on the Westside, call/txt 310-486-6068 or email.