Beautiful professional Knife sharpening with Nubatama ume 4000 and 6000

Knife sharpening with Nubatama ume 4000 and 6000

Knife sharpening with Nubatama ume 4k and 6k

Nubatama ume 4k and 6k

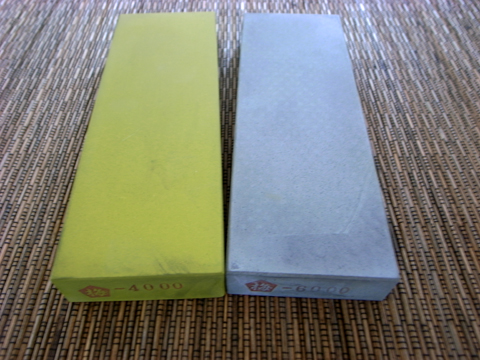
Testing Knife sharpening with the Nubatama ume 4k and 6k, are so different compared with the other stones in the series. First off they are both medium-fine stones, so I will mostly comment on how they feel and what kind of finish they leave. The 4k is medium hard and muddy, a lot like an Aoto. The 6k is hard, so hardly any dishing, no mud is just black swarf from the steel, a great pre-finisher. They both cut fast for their grit range, if any complaints the 4k leaves that green/yellow stain on everything. They both leave a very fine shiny if not mirrorish finish depending on the steel.

Knife sharpening progression

In the pictures below I will show the progression from unsharpened to strop, to demonstrate the whole knife sharpening progression, and where the Nubatamas fit in, in the progress.

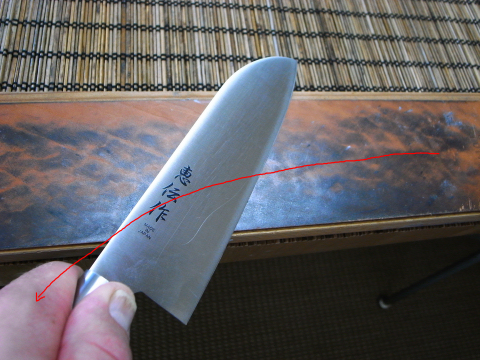
Knife before sharpening

Knife before sharpening 

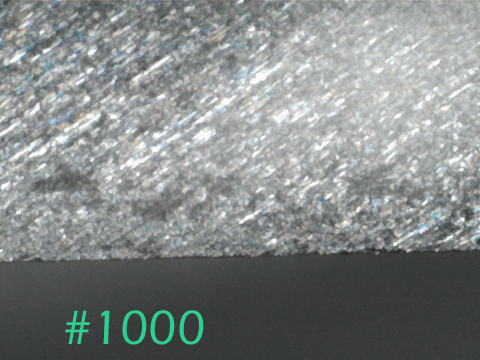
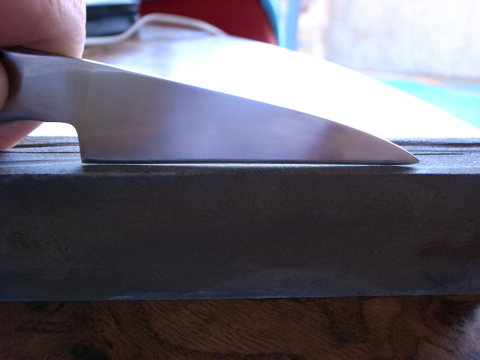
Knife after sharpening on 1000 grit stone

Knife after sharpening on 1000 grit stone

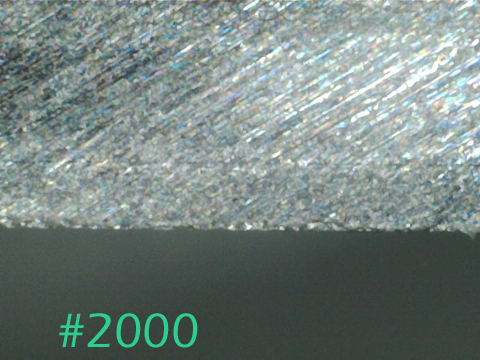
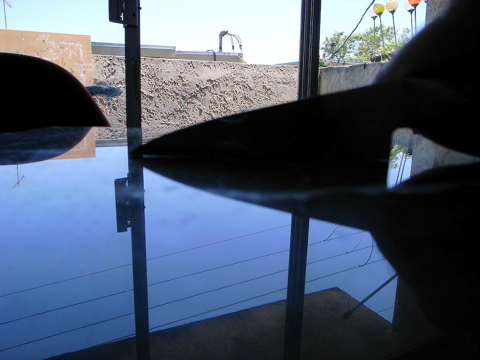
Knife after sharpening on 2000 grit stone

Knife after sharpening on 2000 grit stone 

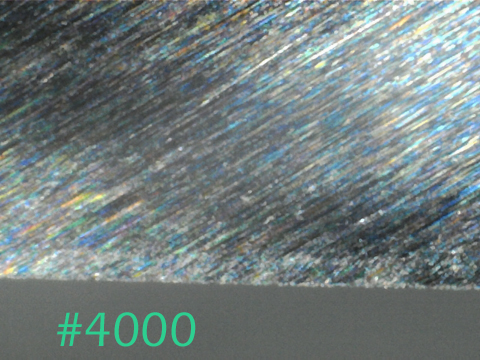
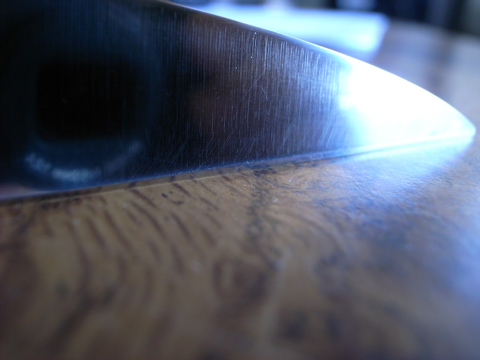
Knife after sharpening on Nubatama ume 4000 grit stone

Knife after sharpening on Nubatama ume 4000 grit stone

As you see the use of Nubatama ume 4000 in the sharpening progression, does a fine job of refining the edge. It feels super smooth, cuts well and it doesn’t mud too much, and it is not rock hard so it still has great feedback. The finish it leaves looks surprisingly more polished than I would have thought; it feels and behaves like a Chosera 3000 stone. This would be a perfect final stone when sharpening soft steel knives.

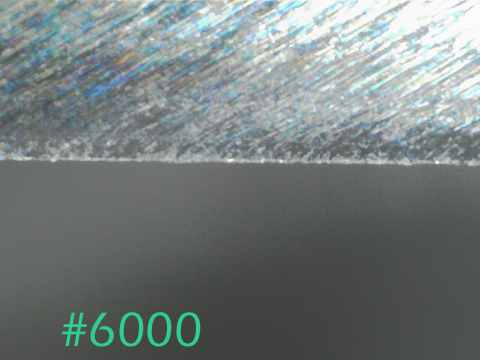
Knife after sharpening on Nubatama ume 6000 grit stone

Knife after sharpening on Nubatama ume 6000 grit stone

Knife sharpening with the 6000 is very different from the 4000, it’s harder, cuts slower, and in close-up it refines the edge with a slightly finer scratch pattern. The most surprising though is that to the naked eye, the polish from the 4000 looks better. At first, I thought I did something wrong, so I retested several times side by side with different knives and every time the 4000 left a better finish to the naked eye, but in close up the 6000 had a slightly better finish. Speculation could be that they have different abrasive densities or different kinds of binding material. If I continue to finer stones, the result of the 6k is better.

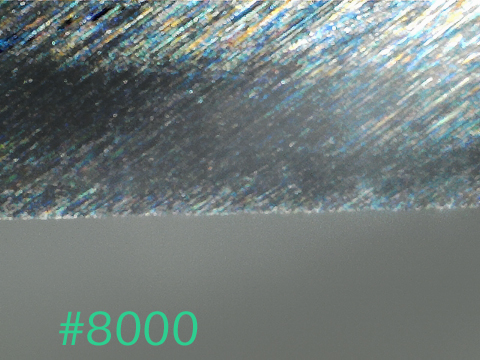
Knife after sharpening on 8000 grit stone

Knife after sharpening on 8000 grit stone

They both clean up well on finer grit stones, but the 6k is a better pre-finisher.

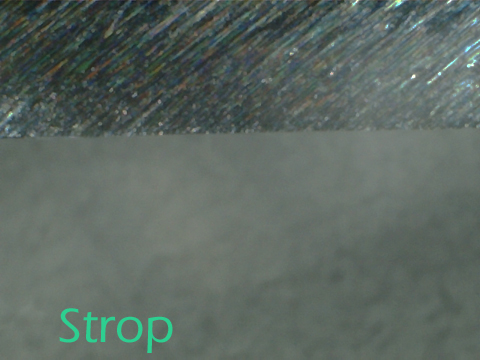
Knife sharpening, final edge after stropping

Knife sharpening, final edge after stropping

Edge after a fast tour on the leather strop.

Conclusion:

I see no need to buy both of these stones for knives because they are not that different. I love the 4000; it is a really nice, fast-cutting stone that leaves an awesome finish. The only thing I don’t like is that green/yellow color that stains everything. The 6000 is also a really good stone that leaves a finer scratch pattern. Its hardness and low mud make it perfect for straight razors.

Magnus Pettersson hand sharpening in Santa Monica.  1-310-486-6068

Professional knife sharpener, review of Nubatama 1000 grit whetstone.

Nubatama ume 1000 grit review

Nubatama ume1000 review

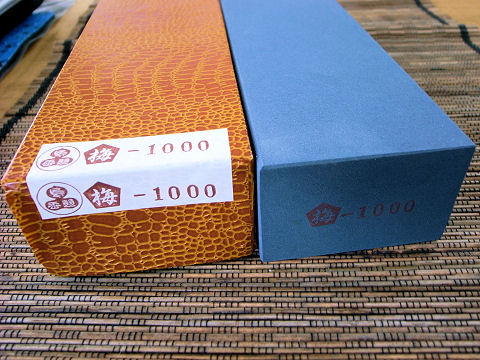
Nubatama ume 1000

I don’t know what to say, this was supposed to be an ordinary review, stating the facts and impression of the stone. Fist off it isn’t like any other 1k stone, it feels porous, have a beautiful deep blue color, sounds porous dry, and feels more like a lower grit stone to the touch. My first thought was to compare it to some other very common stones in this grit range, like Sigma ps, Shapton pro, Beston and Chosera.

The second thought was to compare it to some cheap clay stones and I realized that the Nubatama would eat them alive so that would not be fair. Third thought was Chosera 1k, but I don’t use it anymore, because I usually go straight to Bester 2000 wish is my everyday midrange stone.  Well after the Nubatama 320 retired my Bester 500, maybe I should compare it to Bester 2k instead. I love Bester 2k, I know even before I start that I will still love the Bester in the end, and that there is no way that I will retire it.

Nubatama ume 1000 vs. Bester 2000

  1. Size: Nubatama wins it’s twice the size
  2. Dry out time: Bester 2k wins 3min 10sec and just 2min 26sec for Nubatama
  3. Cutting speed: Nubatama wins it’s not twice as fast, but definitely much faster
  4. Dishing: None of them dish much, but Bester dish slightly less
  5. Finish: Bester 2k wins, it leaves a much clearer finish
  6. Feel: I love the feel of Bester 2k, but with mud build up Nubatama feels super nice just in a different way.

Ok I realize that it isn’t a fair compare, I love the Bester and the grit is too different to even try to compare them. I went and got my old favorite Chosera 1k, to see if that is a better match up.

Nubatama ume 1000 vs Chosera 1000

  1. Size:  Nubatama wins it’s twice the size
  2. Dry out time: They are both thirsty stones but the Chosera wins with a tiny 10sec
  3. Cutting speed: Nubatama wins but not with much, my guesstimate is 5%-10% faster
  4. Dishing: Nubatama wins but not with much
  5. Finish: Chosera wins it has a better finish
  6. Feel: They both feel awesome but very different; I had almost forgotten how smooth the Chosera felt so this is more a matter of taste.
  7. Clean up on higher grit: I give it a slight edge to Chosera, but it is not as much as I would have thought.

Would I replace my favorite Bester 2000 with Nubatama ume 1000, no I would not. Would I choose Nubatama ume 1000 over Chosera 1k. Yes, I would because it is twice the size, dishes less, and doesn’t have that green mud that stains everything. If you care about finish in this grit range, Chosera might be your choice.

Conclusion:

Nubatama ume 1k isn’t a metal-eating beast like Sigma 1k, but it cuts faster than most other 1k stones. It doesn’t dish much and you get a big stone that will last you a while. What is amazing about sharpening on this stone is hard to put down in facts. It is a matter of feeling, after building up the first mud with another 1k stone, it has the magic. That magic feel and sound that makes you drool, awakens that warrior sharpening his sword deep inside, that have been hidden for a long while.

You slow down and close your eyes, hear and feel every stroke against the stone. It makes you feel how the power almost makes your beam energy. Everything else around you disappears. That edge is taken from sharp metal to an edge that will carry a piece of your soul forever.

Do I have to say more, I love the feel of this stone. Now I just have to find use for it. I might end up using it as a step-up stone after Nubatama ume 320. If someone was just buying a single stone to keep their knives sharp, I would definitely recommend Nubatama ume 1k as.

Magnus Pettersson hand knife sharpening in Santa Monica, call or text 310-486-6068 or email.

Keeping your knives happy and sharp, after a professional sharpening

How you could keep your knives sharp. 

1. Use the right knife for the job: a Slicer for slicing, a Chef knife for chopping and dicing, a Paring knife for peeling and delicate stuff, a Bread knife for bread, and a Cleaver for heavy-duty cleaving and chopping. Never use them for anything they are not meant to be used for.

2. Always use a soft cutting board: end-grain wood board or a soft plastic board. Never use ceramic cutting boards, plates, or counters for cutting.

3. Always store your knives in a knife rack or use a magnetic knife holder. Never store your knives in a drawer with other knives unprotected.

4. Hide your grooved steel so you can’t find it, because it is a 99.9% chance that you are doing more harm than good with it to your knives. I don’t care what your butcher or celebrity chef on TV says or does, go and hide that steel now. I would say that half of the knives I sharpen, I do because the client has steeled them dull. Instead, use a ceramic or leather strop. Done regularly a few strokes on each side should be enough, and it will keep your knife sharper much longer.

5. Always rinse and dry your knives after use, don’t leave them dirty on the counter. Never put them in the dishwasher, not even if they say that they are dishwasher safe.

6. Get your knives sharpened before they go really dull, and they will last much longer.

Best knife sharpening in Santa Monica shows how to strop a knife

Stropping knife on a leather strop

Magnus Pettersson hand  knife sharpener

1423 Euclid Street, Santa Monica, CA 90404

For sharpening requests call or text 310-486-6068 or email.

You are welcome to follow me on Instagram @santamonicasharp

What edge angle to use on different knives

What edge angles to use is really subjective, because it is really a matter of personal preferences. The steeper angle the sharper edge, but it will also be more fragile. There is a few other things to take in to consideration though; how will the knife be used, the quality of the steel and blade thickness.

Western kitchen knives are traditionally of softer steel and take an edge angle of 19–23°, while Japanese kitchen knives are traditionally of harder steel and take an edge angle of 13–18°

Here are some rough guide lines, for what edge angle to use:

Thin flexible high quality slicing knives; thin fillet knives and roaster slicers that seldom touches the cutting board 13°

Thin high quality kitchen knives, that gets light use like slicing fish, meat and tomatoes and that needs to be extremely sharp 15°

Medium and heavy duty kitchen knives 18°- 23°

Very thick blades like cleavers 25°- 30°

Small thin pocket knives 20°

Medium pocket knives 23°

Big thick pocket knives 25°

Thin hunting knives 20°

Hunting knives 23°

Heavy duty hunting, camping and utility knives 25°- 30°

Magnus Pettersson hand sharpener, now serving the whole Westside with free pickup and delivery: Santa Monica, Brentwood, Pacific Palisades, Venice, Marina Del Rey, Culver City and West LA.

For free pickup and delivery on the Westside, call/txt 310-486-6068 or email.


Fixing reverse bow edge and sharpening a Global knife

Reverse bow edge on Global knife

Reverse bow edge

As you see in the image of the knife, the edge just make contact at heal and tip, with a big gap between the surface and the edge in the middle. This is a common damage for knives that has been sharpened on small electrical counter machines. The easiest way to fix this is to grind the edge down till it makes contact all the way on the side of a coarse sharpening stone.

The bow edge is know fixed and in contact with the whole edge

The bow edge is know fixed and in contact with the whole edge

This is after the edge grinding, as you see the edge makes contact with the surface all the way. Time to start to recreate the bevel, for this I used a coarse DTM (steel plate with diamond particles embedded. After that I started the sharpening on Beston #500 until I got a good burr, to follow up with a no name #1000 stone, #2000 Bester, #5000 Naniwa and finally Kitayama #8000 stone.

The edge is straight, shiny and sharp on the Global knife

The Global knife once again has its edge straight, sharp and smooth

The edge is straight, smooth and shiny, and you could see that it make contact all the way after the sharpening job.

The edge in  x15 magnification after the sharpening job

The edge in x15 magnification after the sharpening job

Well the edge doesn’t look to shiny magnified x15 in real life it looks mirror polished.

Magnus Pettersson hand sharpener, now serving the whole Westside with free pickup and delivery: Santa Monica, Brentwood, Pacific Palisades, Venice, Marina Del Rey, Culver City and West LA.

For free pickup and delivery on the Westside, call/txt 310-486-6068 or email.


When to have your knife hand sharpen and when to buy a new one

Santa Monica Knife Sharpening blog explains, when to have your knife hand sharpen and when to buy a new one.

A lot of this will be my personal opinions. Usually if you don’t have extremely high quality serrated knife, I would recommend buying a new one instead of getting it sharpened. Example if you have an old 8 inch bread knife, like the one in the picture below. Pro sharpeners would charge around $9 plus $1 per inch of serration, so the total fee of the sharpening job would be around $17

Old serrated bread knife

Old serrated bread knife

For $11.95 you could buy J.A. Henckels International Fine Edge Pro 8-inch Stainless-Steel Bread Knife in the picture below. That I’m sure has both higher quality and a better, sharper edge than anything a pro sharpener could accomplish on your old cheap serrated bread knife and it would save you a few dollars.

New cheap serrated bread knife

New cheap serrated bread knife

Old stainless boning knives, like the one in the picture below. Many times they have been along for a long while, sharpened down to a stick, beaten, sharpened again.

Old boning fillet knife

Old boning fillet knife

I’m sure they might have been ok knives once, but after all that abuse and wrongful sharpening, they are not very useful for anything. You will do better in investing in a new knife, like Victorinox 47513 6-Inch Flex Boning Knife for $17.41 bellow.
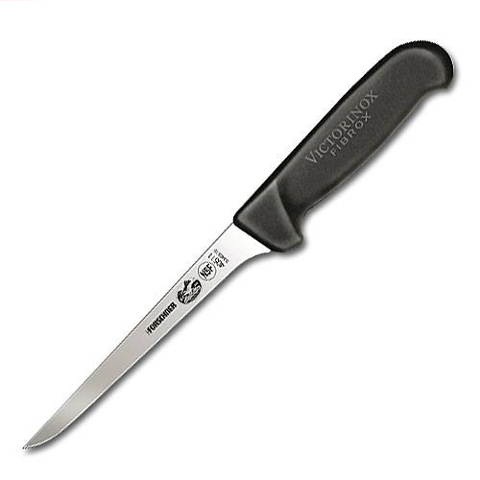
New cheap boning fillet knife

New cheap boning fillet knife

It will have better edge geometry, better harder and more flexible steel and have way better edge retention. As for buying both boning/fillet knives and serrated knives I actually recommend to buy cheap decent quality knives, and save the money to buy a better chef knife and paring knife.

Small guide to buying new knives

1. Don’t buy a knife set, you will probably just end up using 2-3 of the knives any way, use the money to buy better quality chef, slicing and paring knife instead.

2. Most important, make sure the handle works for you. It should fit well in your hand, not being to slippery and give a sense of stability.

3. Choose the right length for your chef knife, your wife wife might prefer a 6” knife and you a 10” knife, an 8” inch would work okay for both of you.

4. Think of how you cut, I’m a rocker so I prefer to have a good bow on my knife, my friend is a push cutter and prefer straighter edge.

5. Choose a knife with high quality steel, high carbon steel knife if you don’t mind some stains and are good on keeping it clean and dry, or a high carbon stainless steel if you are less careful with your knife. Usually the harder steel they sharper the knife could be and softer steel will take a little more abuse. I personally prefer extremely hard Japanese knives.

6. Think about if you prefer a bolster on your knife, some people like the heft it gives the knife. I personally don’t like it and have removed it from the knives I have that had it. Mostly because it makes the knives to front heavy, hard to pinch properly and a real pain to sharpen. Most German knives have bolster, and it is rare to see on Japanese knives now more.

7. Avoid Cutco knives, they are a rip off, they are $25 knives that they sell for a $100, no wonder they could give great warranties with that mark up. Good and affordable knives brands are; Global, Shun, Tojiro and Mac. If these are too much for your budget I would recommend Forschner knives that a great knives for the price.

How to maintain your knives

1. Use the right knife for the right duty, slicing knives for slicing, chef knives for chopping and dicing and paring knives for light duty.

2. Always use a good end wood or nylon cutting board, no cutting on counter, plates and ceramic cutting boards.

3. Always rinse them and dry them off right after use, don’t run them in the dishwasher, don’t let them lay in a dirty sink and so on.

4. Don’t use any kind of electric home knife sharpener, they ruin your knives.

5. Don’t steel your knives if you don’t know how to steel, you just make the knives duller.

6. Keep your knives sharp, and sharpen them before they go dull. If you keep on working with a dull knife you just use more and more force and damage the knife more.

How to sharpen you knives

Get a Japanese combination water stone #1000/#5000 grit, and practice using it on some cheap knives first. There is tons of information online how to do it right, watch a few you tube videos and read up on some of the theory behind sharpening. After just a few hours I promise you will be able to do an ok sharpening job, the knives will be far from razor sharp and will not stay sharp for very long, but will be good enough for kitchen use and with time you will get better and better. If you don’t have the time or feel like sharpening your knives yourself try to find someone that do hand sharpening.

What kind of knives you need

I can’t answer what knives you need, it is rather personal, but for a start I would recommend.

1. A medium size chef’s knife, as a Global G-2 or MAC Superior 8″
2. A decent paring knife like Tojiro DP or Calphalon Katana
3. A good single bevel Japanese slicing knife (Yanagiba) they are great for precision slicing any meat.

Magnus Pettersson hand sharpener, now serving the whole Westside with free pickup and delivery: Santa Monica, Brentwood, Pacific Palisades, Venice, Marina Del Rey, Culver City and West LA.

For free pickup and delivery on the Westside, call/txt 310-486-6068 or email.


Sharpness testing, professional knife sharpener explaining what sharp is happy

Sharpness scale from 0 to 5

Customers say that they want their knives super sharp.  I have to ask them how sharp that is, which they never could answer. Instead, I asked them what or how they cut, meat, produce, or boxes. The follow-up question was if they sliced or chopped, and if they pulled or push cut. If we had a scale from ridiculously sharp as five down to a dull 0. Let’s start with sharpness 5 which is the hanging hair test (HHT).

Hanging hair test

Hanging hair test

5 the hanging hair test

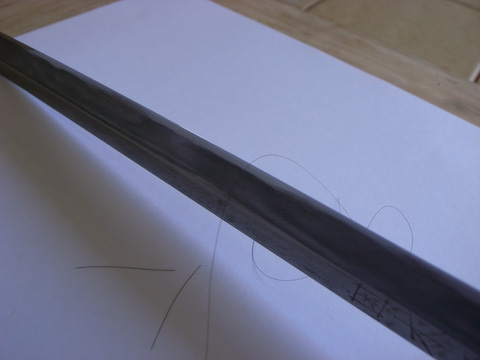
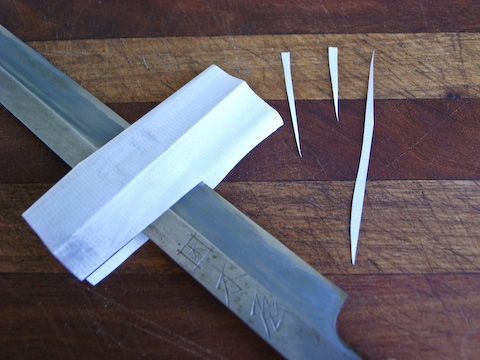
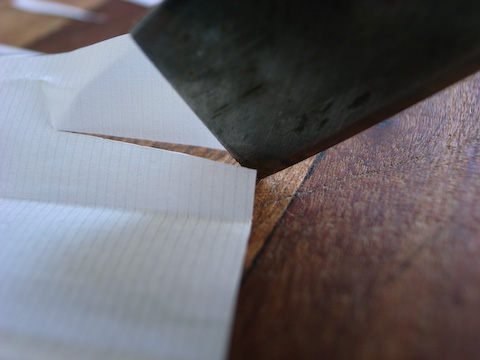
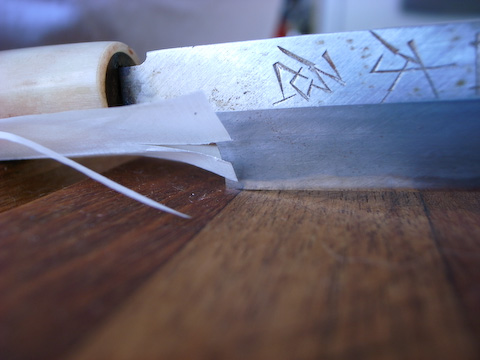
You see that this old knife doesn’t pass the test, because the hair is hanging on the edge. The pieces of cut-off hair on the paper came from that I came in with a bit of an angle lining it up. Next up is sharpness number 4, which is to smoothly slice cigarette paper from heel to tip or push cutting it.

cigarette paper slicing

cigarette paper slicing

cigarette paper cutting with knife tip

cigarette paper cutting with knife tip

cigarette paper cutting with knife heel

cigarette paper cutting with knife heel

4 cigarette paper cutting

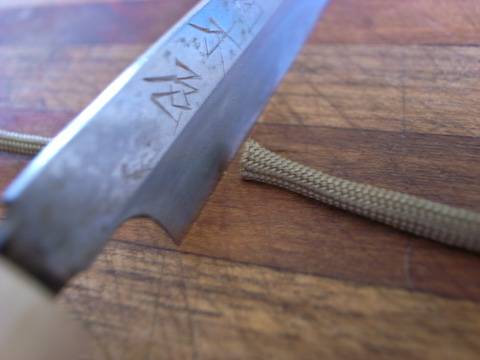
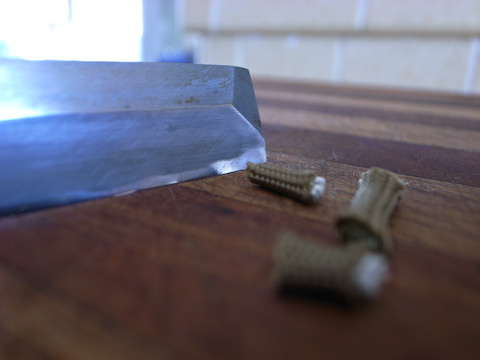
As you see the old knife passes this test, the only thing was that I felt a light resistance at the back and of the heel starting. This is too sharp for a kitchen knife, except for single beveled knives, and delicate fillet knives. 3, which is that it should be able to push-cut Para-cord without a problem from heel to tip and be able to shave hair.

Push cutting paracord easy 1

Push cutting paracord easy 1

Push cutting paracord easy 2

Push cutting paracord easy 2

Shaving hair

Shaving hair

3 shaving hair and push-cutting paracord

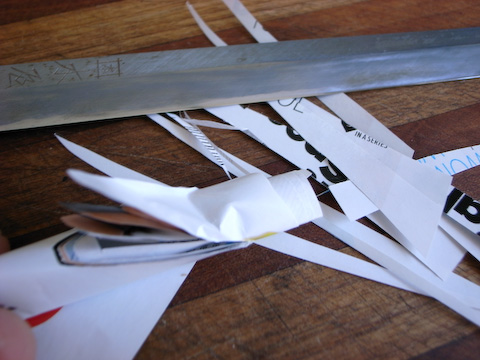
These tests are passed easily; 3 is a good sharpness for most thin kitchen knives like slicers, and fillet knives. Sharpness 2 is to slice magazine paper from heel to tip, slowly, and smoothly without any snagging.

Slicing magazine paper easy and smooth

Slicing magazine paper easily and smoothly

2 Slicing magazine paper smoothly

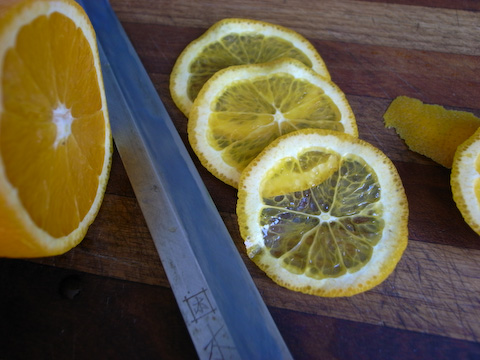
This knife is almost too sharp for this test I’m pretty sure the paper will dull it. 2 is good for medium, and heavy-duty kitchen knives. Believing that most people would be comfortable with 2 sharpness of their kitchen knives. To be able to slice ordinary printing paper, cutting into the side of a tomato or lemon without slipping is the lowest sharpness.

Slicing lemon paper thin

Slicing lemon paper thin

Slicing printing paper smooth for heel to tip

Slicing printing paper smooth from heel to tip

1 Slicing magazine paper

This is still a good sharpness for your heavy-duty kitchen knives and cleavers. If you don’t pass the test, your knife is dull and needs sharpening. I call this sharpness number 0.

Sharpness:       Test:                                                    For:

5                      Hanging hair test                                 Straight razors

4                      Slicing cigarette paper                         Delicate slicing knives

3                      Push cut Para-cord, shaves                 Thin kitchen knives, fillet knives

2                      Slicing magazine paper                       Most medium kitchen knives

1                      Slicing printer paper smooth               Heavy kitchen knives and cleavers

Other sharpness testing is better but takes more skill and danger

Finger nail tests, Does it dig into the nail and grab it? Does it slide smoothly over the nail? If put a low angle against the nail does it stay? The test could all be modified, and be done with a plastic pen but with less feedback.

Slice test, Hard rolled Kleenex, wet rolled towel, tomato slicing, hemp rope slicing, slicing into the side of a standing toilet paper roll.

Thumb test, feel for burr, feel how much it sticks to the finger.

Machine test, Njut, Catra, Bess, Lasergionometer.

Magnus Pettersson hand knife sharpener

1423 Euclid Street, Santa Monica, CA 90404

To request sharpening call or text 310-486-6068 or email.
Please follow my Instagram @santamonicasharp